Motion Panorama with the Fuji HS10
Howdy friends! The Fuji HS10 comes equipped with a handy dandy new feature called Motion Panorama. Those of you looking for a quick and easy way to take very respectable pano’s to share with friends or family then this tip-torial is for you…

Before we jump head first, I want all my intermediate and advanced friends to know that if you’re after high resolution panoramic prints with perfect edge to edge detail, then this mode is not for you. I highly suggest you compose a panorama the old fashioned way by placing the HS10 on a tripod and taking a series photos either vertically or horizontally and then stitching them in an image editing program. This will give you complete control over the entire panoramic image.
Enable Motion Panorama
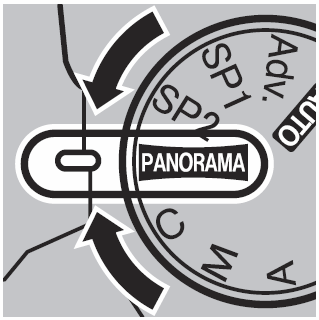
To enable Motion Panorama mode, rotate the HS10 mode dial to the Panorama setting.

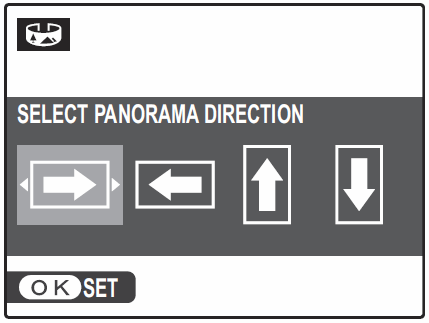
Next, select the direction you want the panorama to go (left/right/up/down).

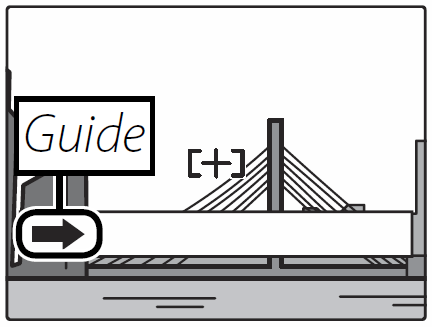
Once you fully press the shutter button, you’ll see an arrow moving in the direction that you chose in the previous step. Begin panning the camera until the arrow hits the end of the guide. Any jerks or sudden movements off the axis in which you’re panning will reduce the effectiveness of the panorama stitch.

Panorama Width
I’ve had a few HS10 owners ask me about the width of pano’s and how to control them. As I mentioned above, the pano will end once the arrow reaches the end of the guide. To reduce the width of the panorama, you’ll need to crop it using an image editing program like Picasa.
 Try holding the HS10 vertically, this will allow you to capture more image area giving you a more impressive panorama shot.
Imagine if you were taking a panorama of a city skyline. If you held the HS10 horizontally, you’d be limited to capturing just skyscrapers. If you held the HS10 vertically, you’d could capture skyscrapers and the sky!
The manual doesn’t say a whole lot about panning speed. It does say that if you go too fast or too slow, the panorama may be unable to complete the stitch process successfully. In my experiments with Motion Panorama, I felt like a slow and smooth panning speed worked best. You’ll have to do some testing on your own to find the right speed.
Sample Fuji HS10 Panoramic Photo
Click here to view a sample panoramic shot that I took with my HS10 (hand-held). From a distance and at smaller image sizes the panorama looks great. Upon closer inspection, you’ll be able to see the areas in which the HS10 tried to stitch the photos together.
If you have any questions about Motion Panorama on the Fuji HS10 please leave a comment to this post and I’ll get back to you lickety split.
Happy Shooting!