Canon 60D: Settings for Landscape Photography
Howdy friends! In this post we’ll take a look at some of the best in-camera settings and shooting modes to help you capture some amazing landscapes with your 60D.
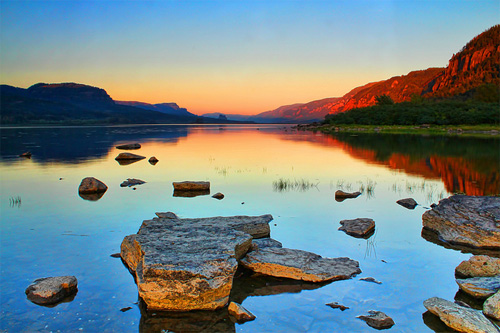
In the photo above, you’ll see a great landscape shot taken with the Canon 60D. Let’s examine how the photographer got such a wonderful shot…
Settings
- Photographer: Don Briggs (Photo Gallery)
- Camera: Canon 60D
- Lens: Canon 18-55mm IS
- Shooting mode: Aperture Priority
- Aperture: f/22
- Shutter Speed: 0.5
- ISO: 400
As you can see, everything from the boulders right in front of the camera to the mountains in the distance are in focus. To do this, you’ll need to use a higher f/number…somewhere between f/11 to f22.
You can achieve a higher f/number by shooting in…
- Landscape Mode
- Aperture Priority Mode (Av)
Landscape Mode
 Landscape mode is designed to increase the f/number so that subjects near and far are in focus. At the same time, it saturates greens and blues to make the landscape more vivid.
Landscape mode can be used during the day or at night, however, in both shooting situations be mindful of the shutter speed.
Higher f/stop numbers lead to slower shutter speeds. This makes hand holding your 60D very difficult. In situations when the shutter speed is too slow and your image is being affected by camera shake, you’ll need to mount your 60D to a tripod (I like this one).
 Landscapes are best shot during the Golden Hour, when the sun is low in the horizon. The Golden Hour is 30 minutes before and after dusk or dawn.
Aperture Priority Mode
 Aperture Priority mode (Av) is an advanced mode that allows you to control the f/number while the 60D controls the shutter speed. Generally speaking, I start at f/11 and work my way up depending on how much light is available.
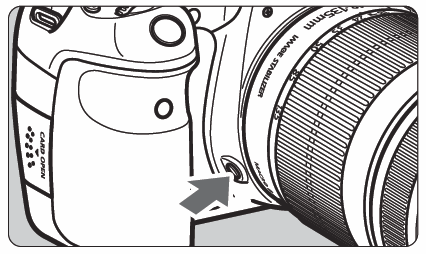
After selecting the f/number, press the depth of field preview button to check the area in focus. When this button is activated, the lens is stopped down to the current aperture setting which will allow you to see the depth of field effect.

As mentioned above, higher f/numbers equal slower shutter speeds. Slower shutter speeds can cause camera shake which will make the entire image appear blurry. To completely eliminate camera shake, use a tripod to get your hands off the camera.
To get even sharper results, enable the self timer function (page 82 of the 60D manual). With the self timer enabled, you can ensure that your hand movements won’t affect the overall sharpness of your image.
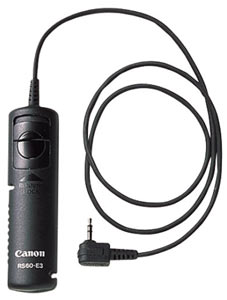
You can also use a remote switch like the Canon RS60 E3 to control the shutter button, without “touching” the camera. The RS60 plugs into the remote control port on the side of the camera.

I hope you enjoyed this landscape tutorial for the 60D. Happy shooting!
